
Free Penguin Crochet Pattern (Amigurumi Penguin)
Free Penguin Crochet Pattern (Amigurumi Penguin)
This post contains affiliate links. If you purchase through these links, I may earn a small commission at no extra cost to you.
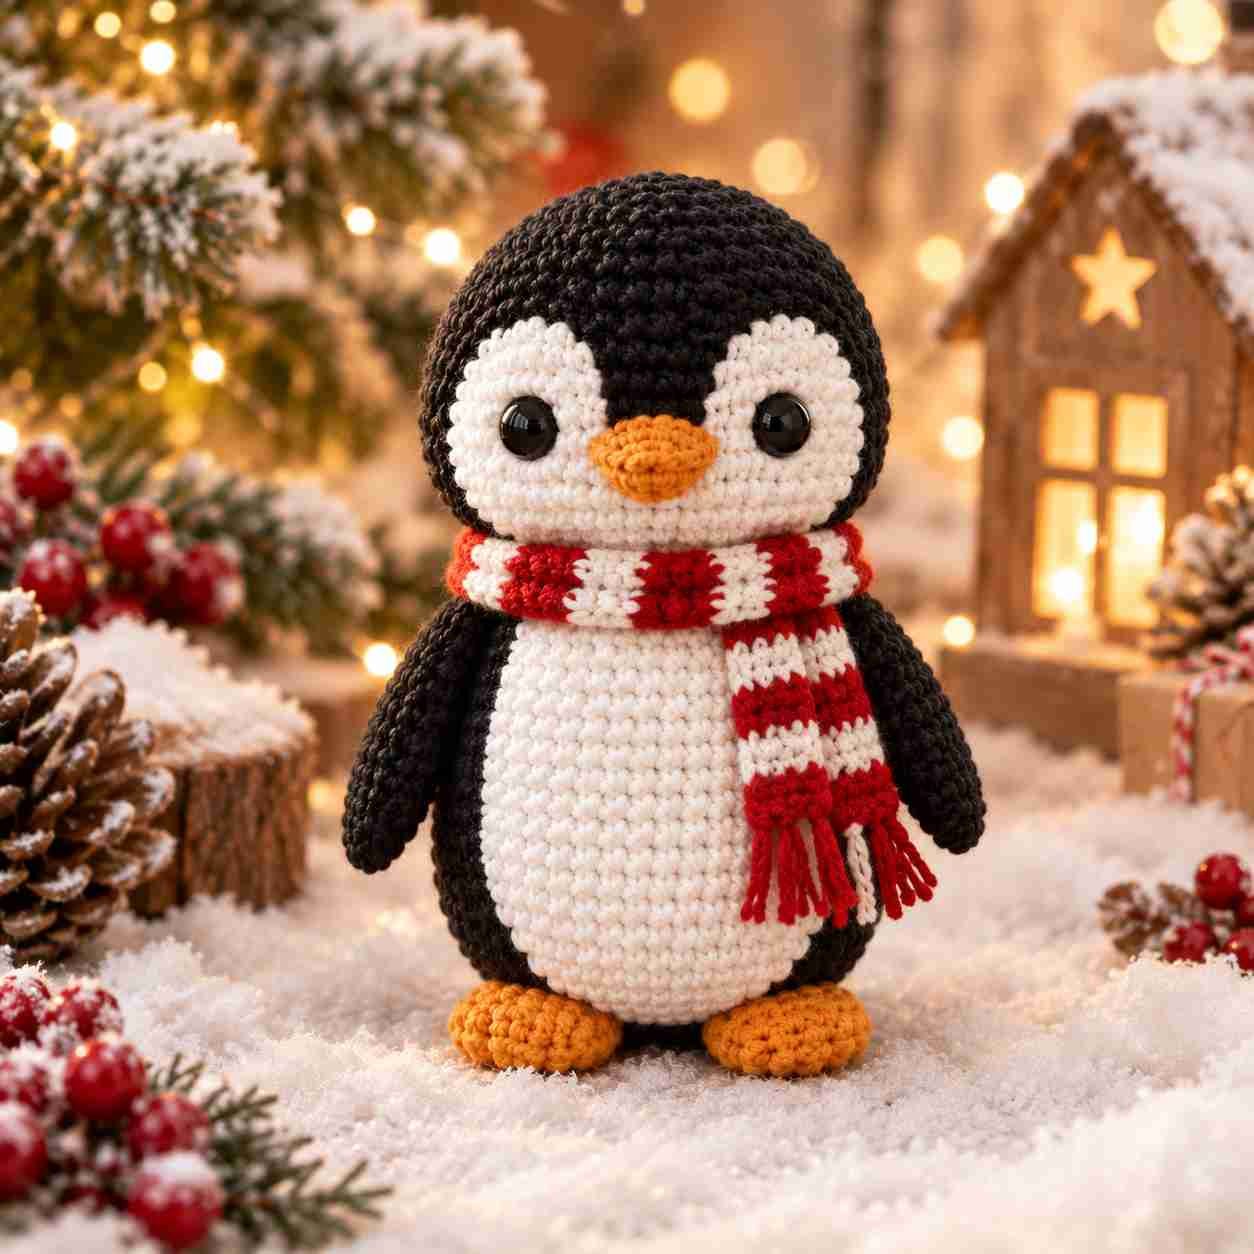
Meet Pip, a round little amigurumi penguin with a black-and-white body, orange feet, and a design built to stand upright on its own ,no propping required. This is the final pattern in our five-animal beginner series, and it brings together everything you’ve practiced so far: the color-blocking from the panda pattern, the basic body shaping from the bunny and bear, plus one brand-new skill specific to penguins ,a flat, weighted base that lets the finished piece stand up straight, just like the real bird.
Pip stands at approximately 7.5 inches tall. Between the color changes and the standing base construction, this pattern takes most crocheters around 5 hours to complete. If this is your first amigurumi from this series, we’d recommend trying the bunny pattern first ,but if you’ve already made the panda, you already have the two-color skills you need here.
A Few Penguin Facts
Penguins are flightless birds, and their wings have evolved into flat, paddle-like flippers used for swimming rather than flying ,which is why an amigurumi penguin’s “arms” are flat ovals rather than the rounded, three-dimensional arms used on the other animals in this series. Most penguin species also stand and walk upright on land, balancing on their heels with stiff tail feathers propping them up slightly from behind ,a detail that inspired the flat stitched-in base used in this pattern to keep your finished penguin standing without extra wire or weights.
Materials Needed
- Worsted weight yarn (US #4) in black for the back, head, and flippers — approximately 60g
- Worsted weight yarn in white for the belly and face — approximately 50g
- Small amount of orange or yellow yarn for the beak and feet
- 3.5mm crochet hook
- Polyester fiberfill stuffing
- 9mm safety eyes
- A small circle of stiff cardstock or plastic canvas (optional, for the base — see the “Standing Balance” tip below)
- Tapestry needle
- Stitch marker
- Scissors
A note on stuffing density: this pattern needs firmer, denser stuffing than the other animals in the series, especially in the base and lower body, since a softly stuffed penguin is more likely to tip over rather than stand upright.
Finished Size
Approximately 7.5 inches (19cm) tall when standing. Unlike the seated animals in this series, height here is measured standing up, from the base to the top of the head.
Gauge
- 4 single crochet stitches = 1 inch
- 4 rows = 1 inch
As with the panda pattern, consistent tension is especially important where the black and white sections meet on the belly patch.
Standing Balance: The Key Technique in This Pattern
What makes a penguin amigurumi different from every other pattern in this series is that it needs to stand upright on a flat surface rather than sit. Three things make this possible: a wide, flattened base worked with extra increase rounds so the bottom of the body is broader than the top; dense stuffing concentrated in the bottom third of the body, which lowers the center of gravity; and, optionally, a small stiff circle (cut from cardstock or plastic canvas) inserted into the base before closing it up, which keeps the bottom perfectly flat rather than curving inward as amigurumi bases often do. This third step isn’t required, but it makes a noticeable difference if your penguin tends to rock or lean.
Tips Before You Start
- Stuff the base and lower body firmly before moving on to the upper body ,it’s much harder to add enough stuffing to fix a wobbly base after the piece is fully closed.
- Work the belly patch as a separate flat white oval sewn onto the black body, rather than trying to color-change mid-round ,this gives you full control over the belly shape, which is what makes a penguin instantly recognizable.
- Keep the flippers flat and unstuffed (or only very lightly stuffed) ,real penguin flippers are flat, and overstuffing them makes them look more like arms than wings.
- If using the optional cardstock base insert, trace around your last base round before cutting the circle, so it fits snugly without stretching the stitches.
Common Mistakes to Avoid
A few issues are specific to penguin amigurumi and worth watching for:
- Penguin tips over after assembly. This almost always comes down to insufficient stuffing density in the base, or a base that wasn’t worked wide enough relative to the body height.
- Belly patch that’s too narrow or too wide. A belly patch that’s roughly 60% of the body’s width, centered on the front, reads as proportional; much narrower looks like a bib, much wider makes the penguin look mostly white instead of black-and-white.
- Flippers sewn too high or too low. Real penguin flippers sit roughly at the midpoint of the body, not near the neck or near the base ,check placement against a reference photo before sewing.
- Beak that’s too small to see. Because the beak is a small detail on a mostly black-and-white piece, an orange beak worked slightly larger than you’d expect actually looks more proportional once stuffed.
Penguin Crochet Pattern
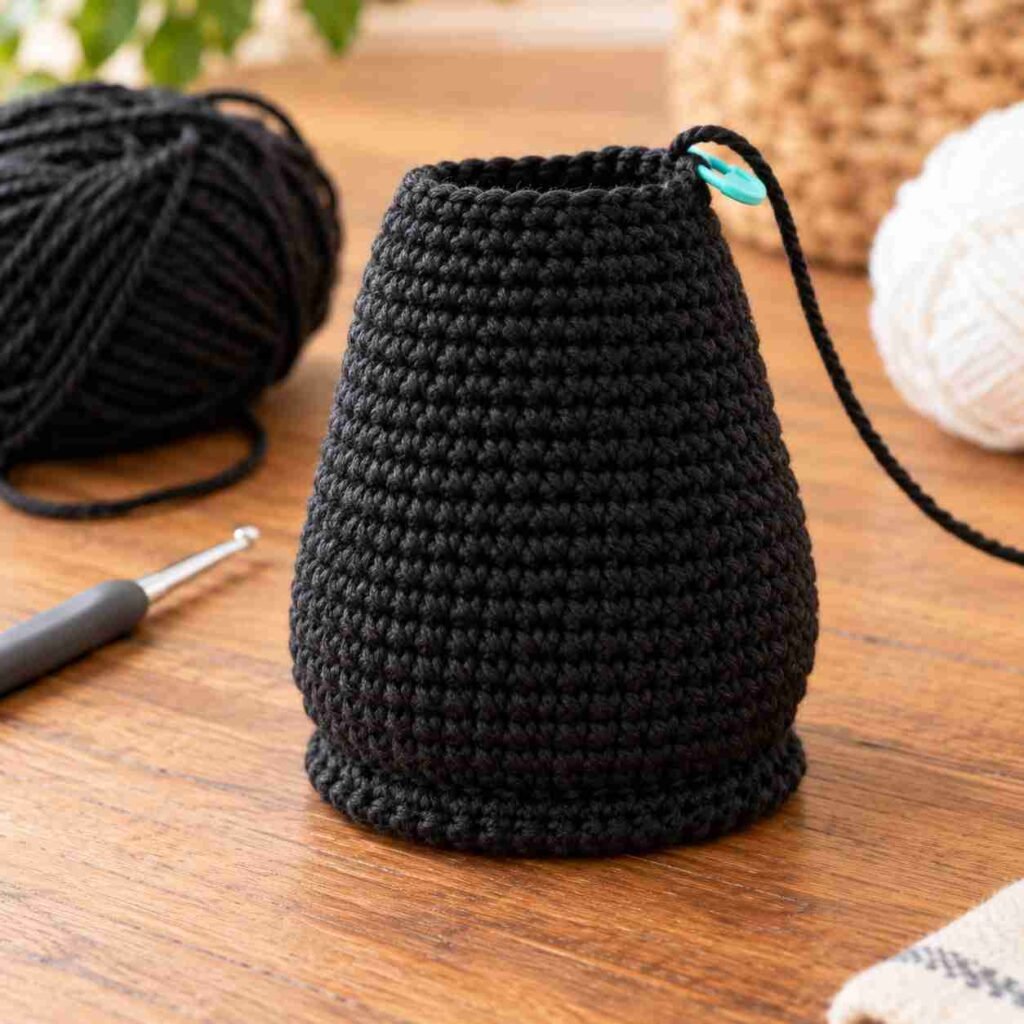
Head & Body (worked as one piece, in black)
- Rnd 1: MR, 6 sc into ring (6)
- Rnd 2: inc in each st around (12)
- Rnd 3: [sc, inc] x 6 (18)
- Rnd 4: [sc 2, inc] x 6 (24)
- Rnds 5-9: sc around (24) — 5 rounds
Insert safety eyes between rounds 6 and 7, spaced about 7 stitches apart.
- Rnd 10 (neck indent): [sc 2, dec] x 6 (18)
- Rnd 11: [sc, inc] x 9 (27) — begin widening back out into the body
- Rnd 12: [sc 2, inc] x 9 (36)
- Rnds 13-19: sc around (36) — 7 rounds
Begin stuffing the head firmly, then continue stuffing the body as you work, keeping it dense.
- Rnd 20 (base widening): [sc 5, inc] x 6 (42)
- Rnd 21: sc around (42)
If using the optional cardstock base insert, place it now, then finish stuffing firmly around it before closing.
- Rnd 22: [sc 5, dec] x 6 (36)
- Rnd 23: [sc 4, dec] x 6 (30)
- Rnd 24: [sc 3, dec] x 6 (24)
- Rnd 25: dec x 12 (12)
- Rnd 26: dec x 6 (6)
Fasten off and close the base opening.
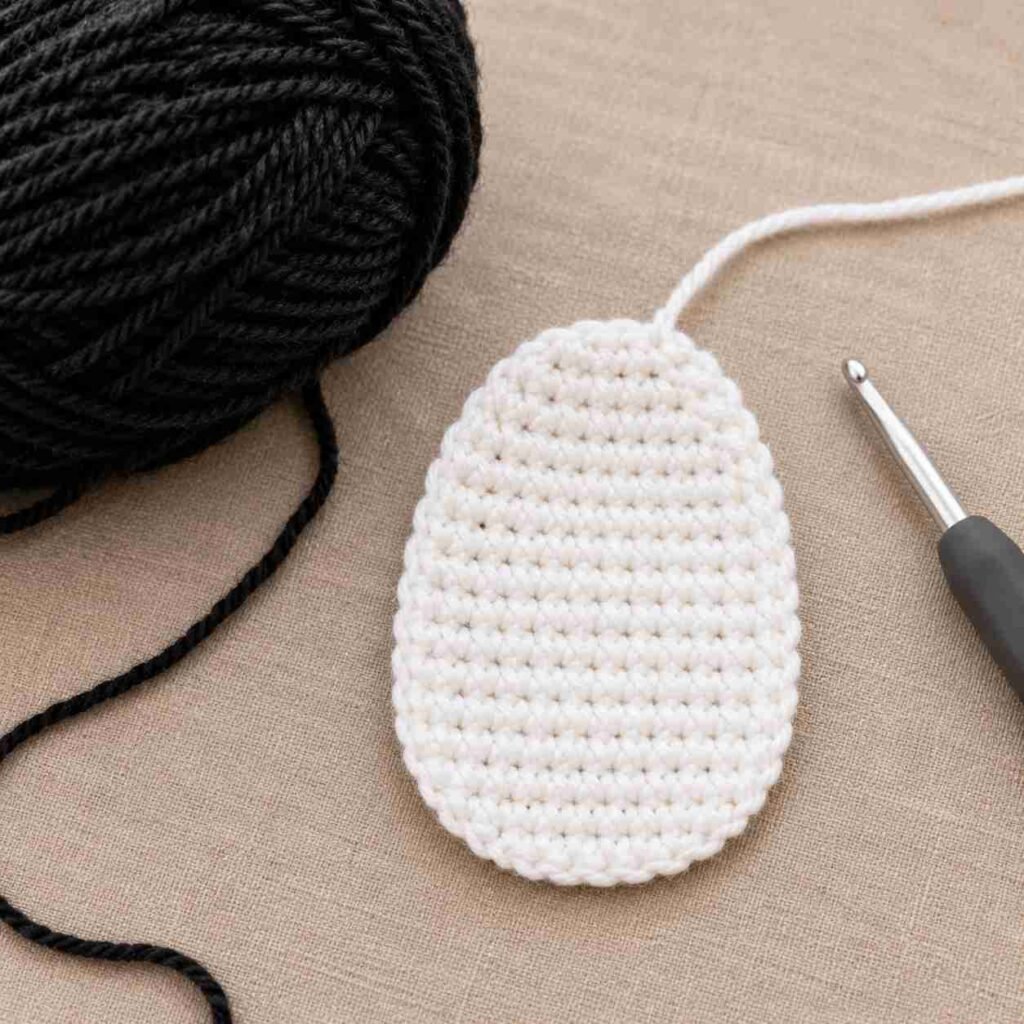
Belly Patch (in white, worked flat)
- Row 1: Ch 2, 2 sc in 2nd ch from hook (2)
- Row 2: inc, inc (4)
- Row 3: sc, inc, inc, sc (6)
- Row 4: sc across (6)
- Rows 5-9: inc first and last st of row, sc across the rest (increasing 2 per row until you reach 16 sts, then work even for the remaining rows)
- Final 3 rows: sc across evenly (no increases) to finish the oval
Fasten off, leaving a tail for sewing. Position the belly patch centered on the front of the body, spanning from just under the chin down to just above the base, and sew around the edge.
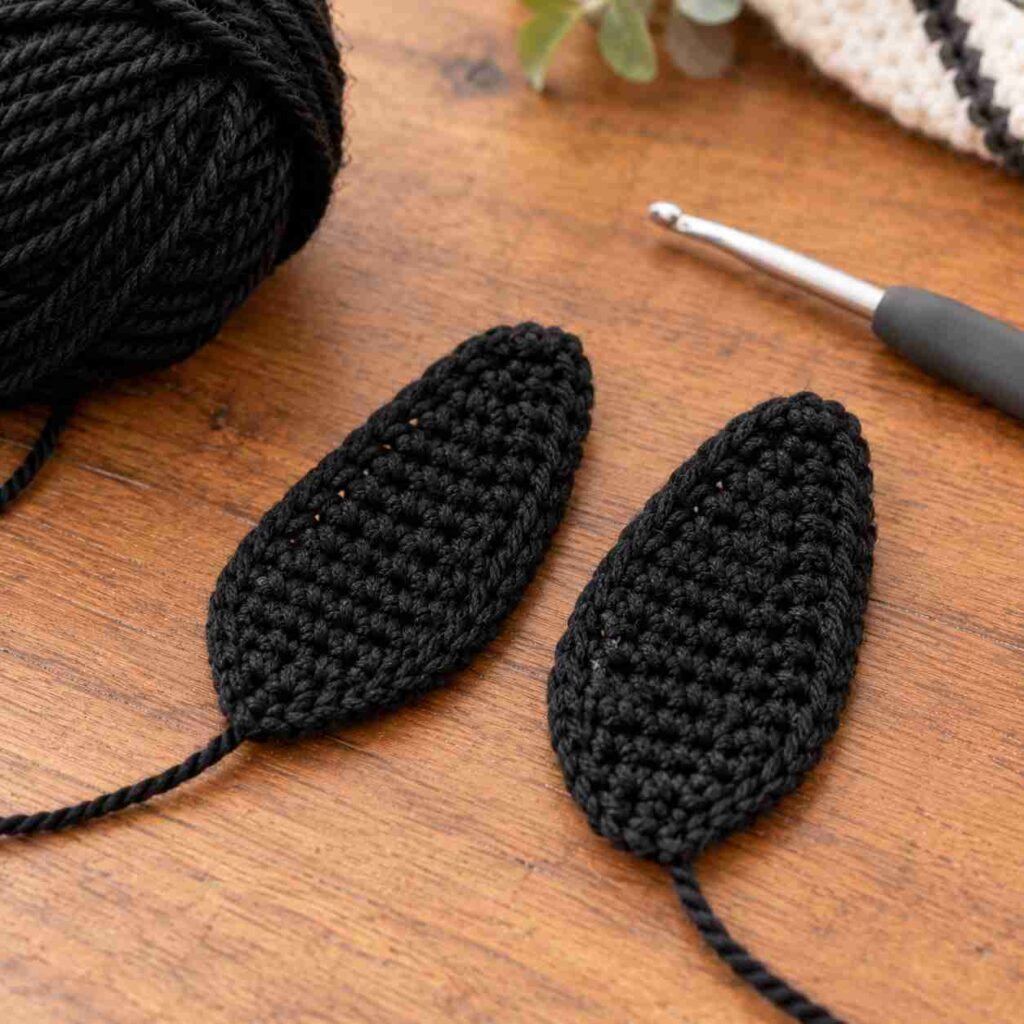
Flippers (Make 2, in black, worked flat)
- Row 1: Ch 2, 3 sc in 2nd ch from hook (3)
- Row 2: inc, sc, inc (5)
- Rows 3-8: sc across (5) — 6 rows
- Row 9: dec, sc, dec (3)
Fasten off, leaving a tail for sewing. Do not stuff ,flippers should lie flat against the body.
Beak (in orange/yellow)
- Rnd 1: MR, 5 sc into ring (5)
- Rnd 2: sc around (5)
Fasten off, leaving a short tail. Stuff very lightly and sew onto the face just below the eyes, angled slightly downward.
Feet (Make 2, in orange/yellow, worked flat)
- Row 1: Ch 4, sc in 2nd ch from hook and each ch across (3)
- Row 2: inc in first st, sc, inc in last st (5)
Fasten off, leaving a tail for sewing. These small flat pieces sit under the front base edge and are barely visible once the penguin is standing, but add a nice finishing detail peeking out from the front.
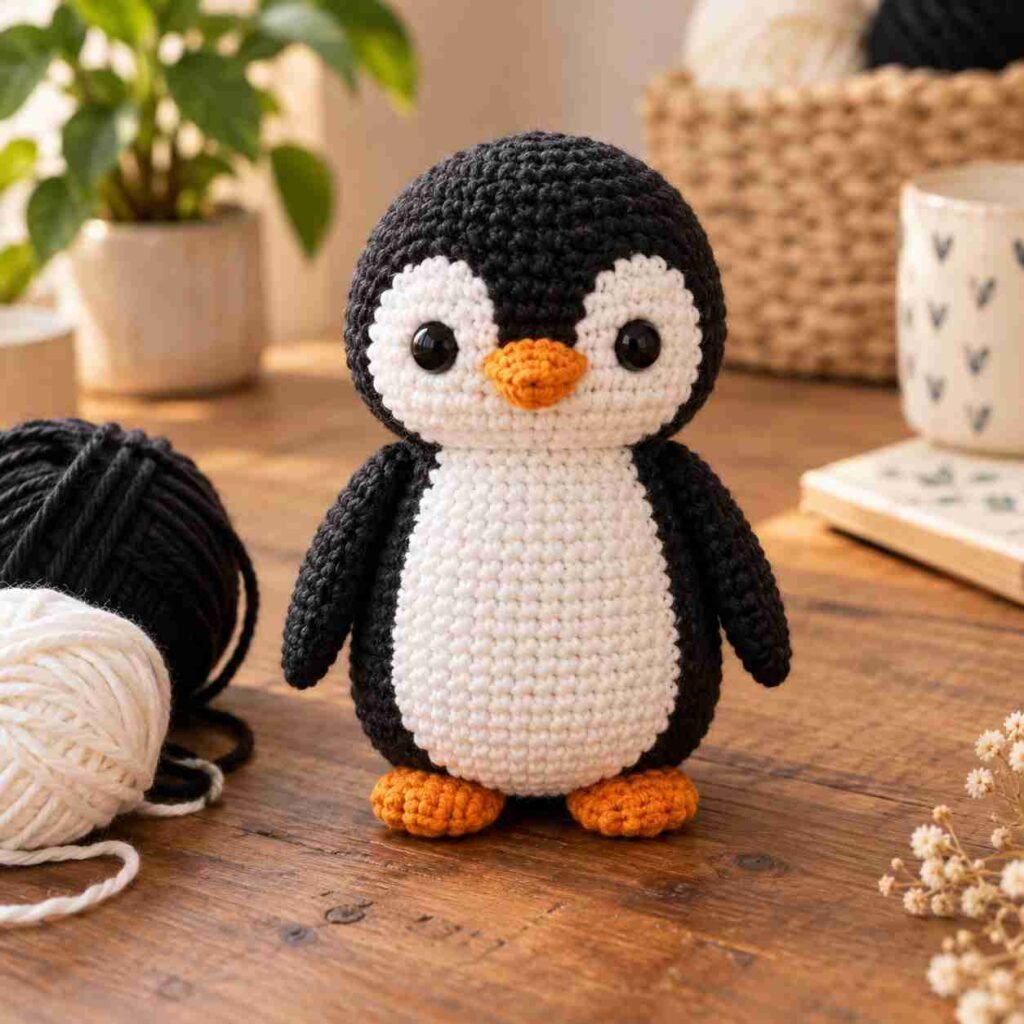
Assembly
Step 1: Sew the belly patch onto the front of the body before attaching any other pieces ,it’s much easier to center correctly on a bare body.
Step 2: Sew the beak onto the face, just below and between the eyes.
Step 3: Attach the flippers to either side of the body, at roughly the midpoint height, angled slightly backward as if mid-waddle.
Step 4: Tuck the feet just under the front edge of the base and sew in place so only the front of each foot peeks out.
Step 5: Set the finished penguin on a flat surface and check that it stands without tipping ,if it leans, add a little extra stuffing to the lighter side of the base through a small gap before fully closing it.
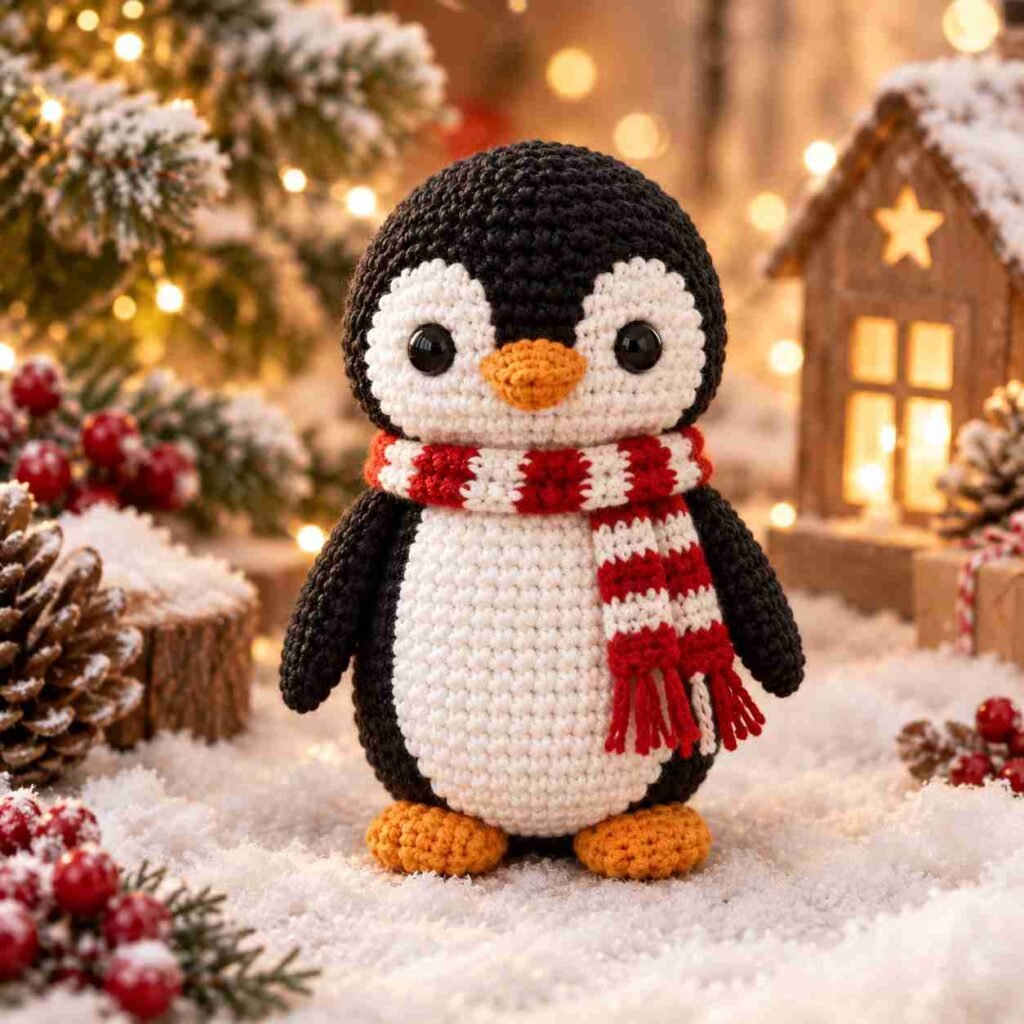
Variation: Christmas Penguin
This penguin pattern doubles easily as a holiday decoration. Crochet a thin strip in red and white stripes (a simple foundation chain worked in single crochet for 4-5 rows) and tie it around the neck as a scarf, or add a small red pom-pom hat using a few rounds of red single crochet shaped like a tiny beanie. Because penguins are already strongly associated with winter, this variation tends to perform especially well on Pinterest from late November through December.
Frequently Asked Questions
Why won’t my penguin stand up on its own? This is almost always a stuffing or base-width issue — make sure the base is stuffed firmly and densely, and consider adding the optional cardstock circle insert for extra stability.
Can I make a baby penguin version? Yes — reduce the body rounds by removing 1-2 repeat rounds before the base widening section, and use a slightly smaller belly patch and flippers to match the smaller proportions.
Do I need the cardstock base insert? No, it’s optional — dense stuffing alone is often enough, but the insert makes a noticeable difference if you’re using a softer stuffing or a stretchier yarn.
How much yarn do I need in total? Approximately 60g of black and 50g of white, plus a small amount of orange or yellow for the beak and feet.
Is this the hardest pattern in the series? It’s tied with the panda for the most technical pattern here, combining color-blocking with the added challenge of the standing base — a good final project after completing the other four.
Final Thoughts
Pip wraps up this five-animal beginner series, and if you’ve made all five, you’ve now practiced basic amigurumi shaping, pointed and flat pieces, color-blocking, and now a standing base ,a solid foundation for tackling almost any amigurumi pattern you come across next. Share your finished penguin in the comments below, or tag us on social media ,we’d love to see your finished set of all five animals together !