
Free Cat Crochet Pattern (Amigurumi Kitten)
Free Cat Crochet Pattern (Amigurumi Kitten)
This post contains affiliate links. If you purchase through these links, I may earn a small commission at no extra cost to you.
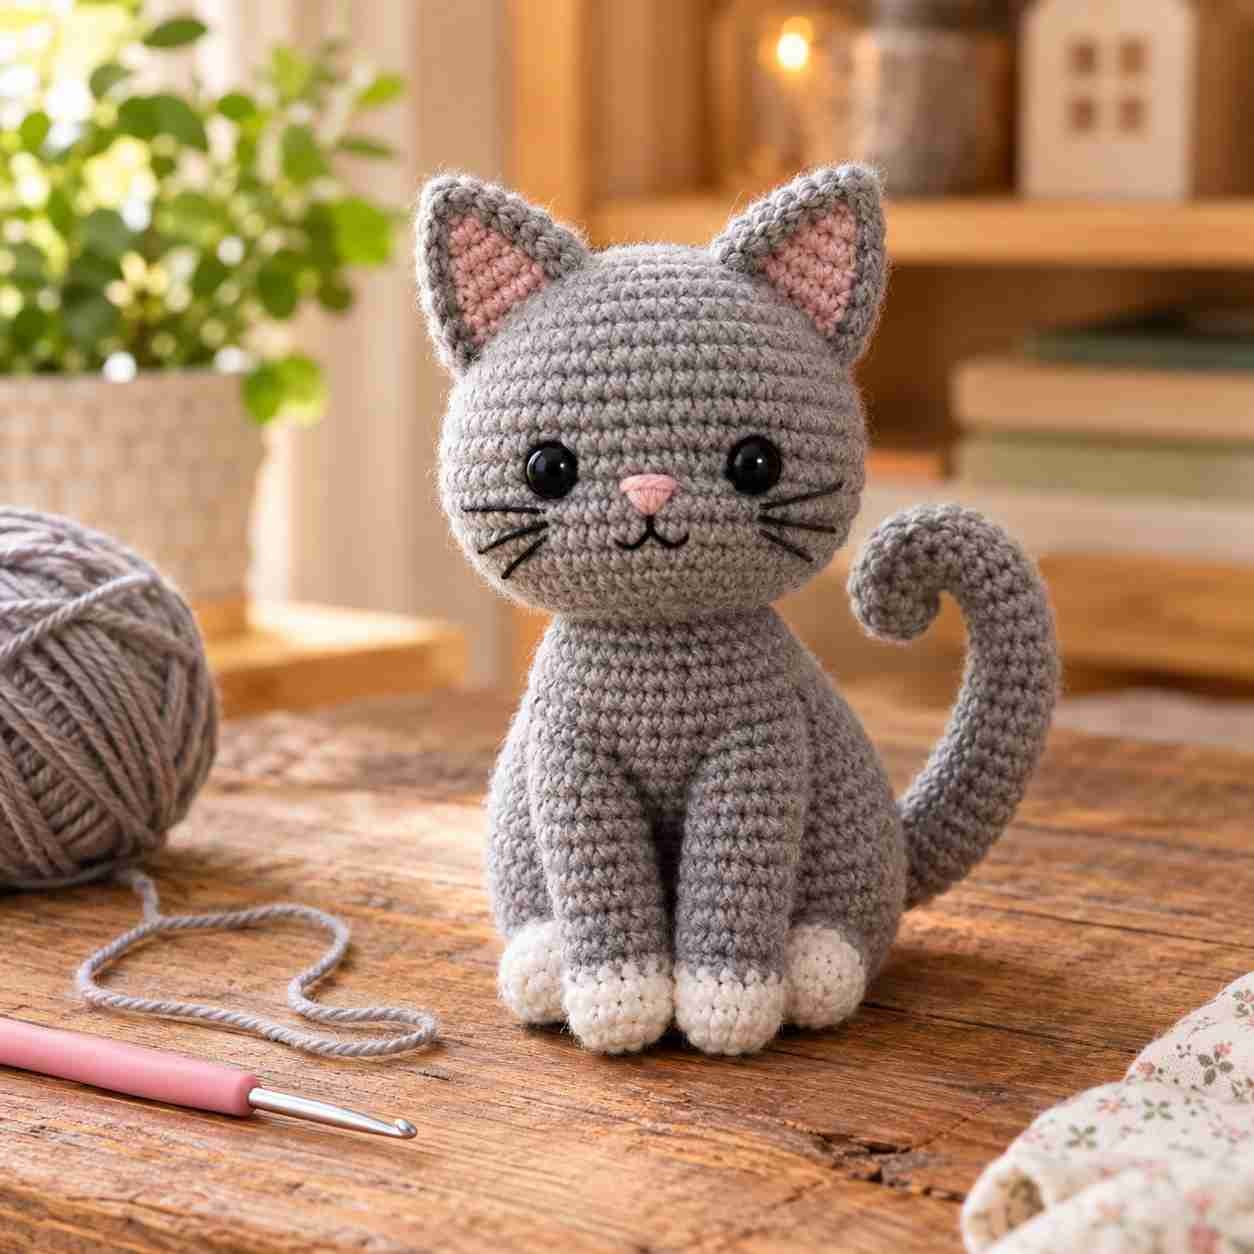
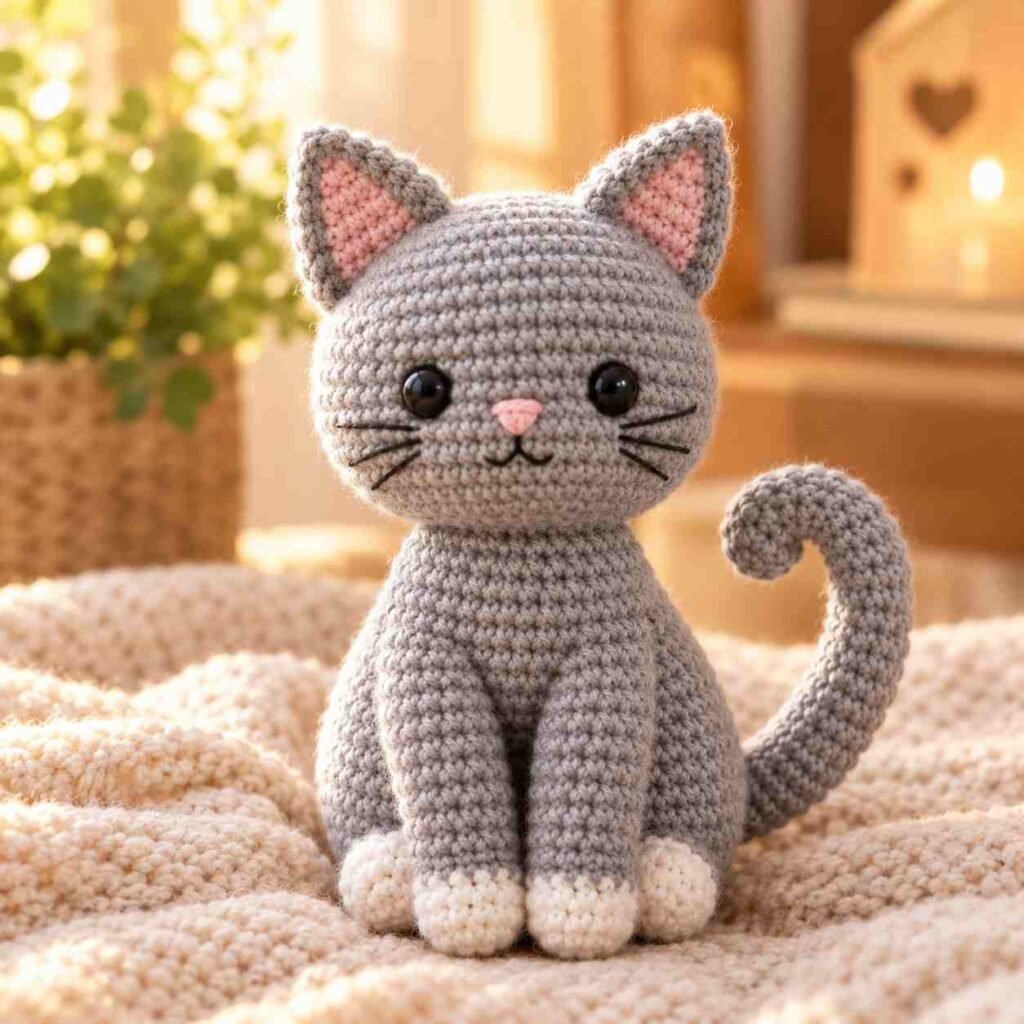
Meet Mochi, a round-cheeked amigurumi kitten with signature pointed ears and a long curled tail. Cats are consistently one of the most requested amigurumi subjects, and it’s easy to see why ,a well-shaped cat pattern works as a gift for cat lovers, a nursery decoration, or a keepsake made in the likeness of someone’s real pet. This pattern builds on the shaping techniques from our bunny and teddy bear patterns, while introducing pointed ears and a distinct tail shape that give this design its recognizable feline silhouette.
Mochi stands at approximately 7 inches tall when seated, with a body slightly smaller and rounder than the bear pattern, which suits a cat’s more compact proportions. This project takes most crocheters around 4 hours to complete. If you’ve already made our bunny or bear pattern, you’ll recognize most of the shaping here ,the main new skills are the pointed ear shape and the long, curled tail.
Materials Needed
- Worsted weight yarn in your chosen main color ,approximately 100g (see “Color Variations to Try” below for popular options)
- Small amount of pink yarn for the inner ears and nose
- Small amount of white yarn if adding paws, chest, or muzzle markings
- 3.5mm crochet hook
- Polyester fiberfill stuffing
- 9mm safety eyes
- Black embroidery thread for the nose and whiskers
- Tapestry needle
- Stitch marker
- Scissors
A note on whisker thread: regular embroidery floss tends to look more realistic than yarn for whiskers, since it’s thin and slightly stiff. Nylon thread or clear fishing line are also popular choices among amigurumi makers because they hold their shape and stay perfectly straight.
Finished Size
Approximately 7 inches (18cm) tall when seated. Cats are often made slightly smaller than bears or bunnies to keep their proportions realistic, since real kittens are more compact and narrow than round teddy bear shapes. If you’d like a chunkier, more stylized cat, simply add one extra increase round to the body.
Gauge
- 4 single crochet stitches = 1 inch
- 4 rows = 1 inch
As with our other patterns, gauge affects final size more than shape ,focus on consistent tension rather than matching this number exactly.
Tips Before You Start
- Pointed ears rely on a flat triangle shape rather than a rounded one , work them flat (in rows, not rounds) for a crisp, defined point.
- Pin the tail’s curve before sewing. Because the tail is long and thin, its curl direction should be decided and pinned in place before you commit to stitching it down.
- Keep whisker embroidery symmetrical by counting stitches from the center of the nose outward on both sides before threading the whiskers through.
- If adding white paw or chest markings, work those sections first in white, then switch colors ,trying to add white patches after the piece is finished is much harder than planning the color change into the round.
Common Mistakes to Avoid
A few issues come up often with cat amigurumi specifically, more so than with rounder animals like bears or bunnies:
- Ears placed too far apart or too close together. Cat ears sit closer to the center-top of the head than bear or bunny ears ,placing them too wide apart makes the cat look more like a bear.
- Tail that’s too short or too thick. A cat’s tail is proportionally long and thin compared to its body; a short, thick tail reads as a different animal entirely (or as a stump).
- Overstuffing the head. Cats have a slightly flatter, more oval face than bears ,overstuffing can round the head out too much and lose the characteristic feline shape.
- Whiskers that are too thick or too long. Regular yarn is almost always too bulky for whiskers; thin embroidery floss or thread gives a much more proportional, realistic result.
Cat Crochet Pattern
Head
Using main color:
- Rnd 1: MR, 6 sc into ring (6)
- Rnd 2: inc in each st around (12)
- Rnd 3: [sc, inc] x 6 (18)
- Rnd 4: [sc 2, inc] x 6 (24)
- Rnd 5: [sc 3, inc] x 6 (30)
- Rnds 6-11: sc around (30) — 6 rounds
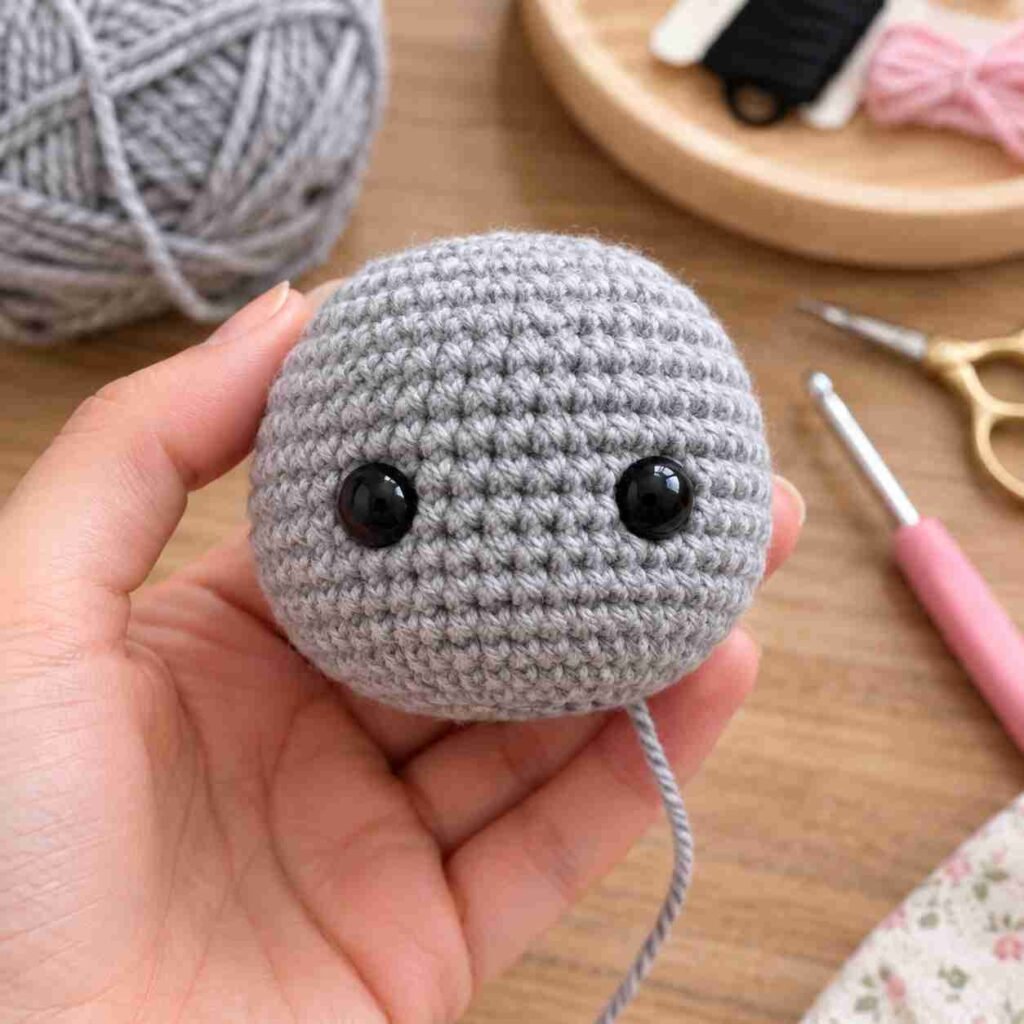
Insert safety eyes between rounds 7 and 8, spaced about 8 stitches apart ,slightly closer together than on the bear, to suit a narrower cat face.
- Rnd 12: [sc 3, dec] x 6 (24)
- Rnd 13: [sc 2, dec] x 6 (18)
Begin stuffing firmly.
- Rnd 14: [sc, dec] x 6 (12)
Finish stuffing.
- Rnd 15: dec x 6 (6)
Fasten off, leaving a long tail for sewing to the body. Embroider a small pink triangle nose and a black “Y” mouth beneath the eyes, then add 3 whiskers on each side using embroidery thread.
Ears (Make 2 — worked flat, not in rounds)
Using main color:
- Row 1: Ch 2, 3 sc in 2nd ch from hook (3)
- Row 2: inc, sc, inc (5)
- Row 3: sc across (5)
- Row 4: dec, sc, dec (3)
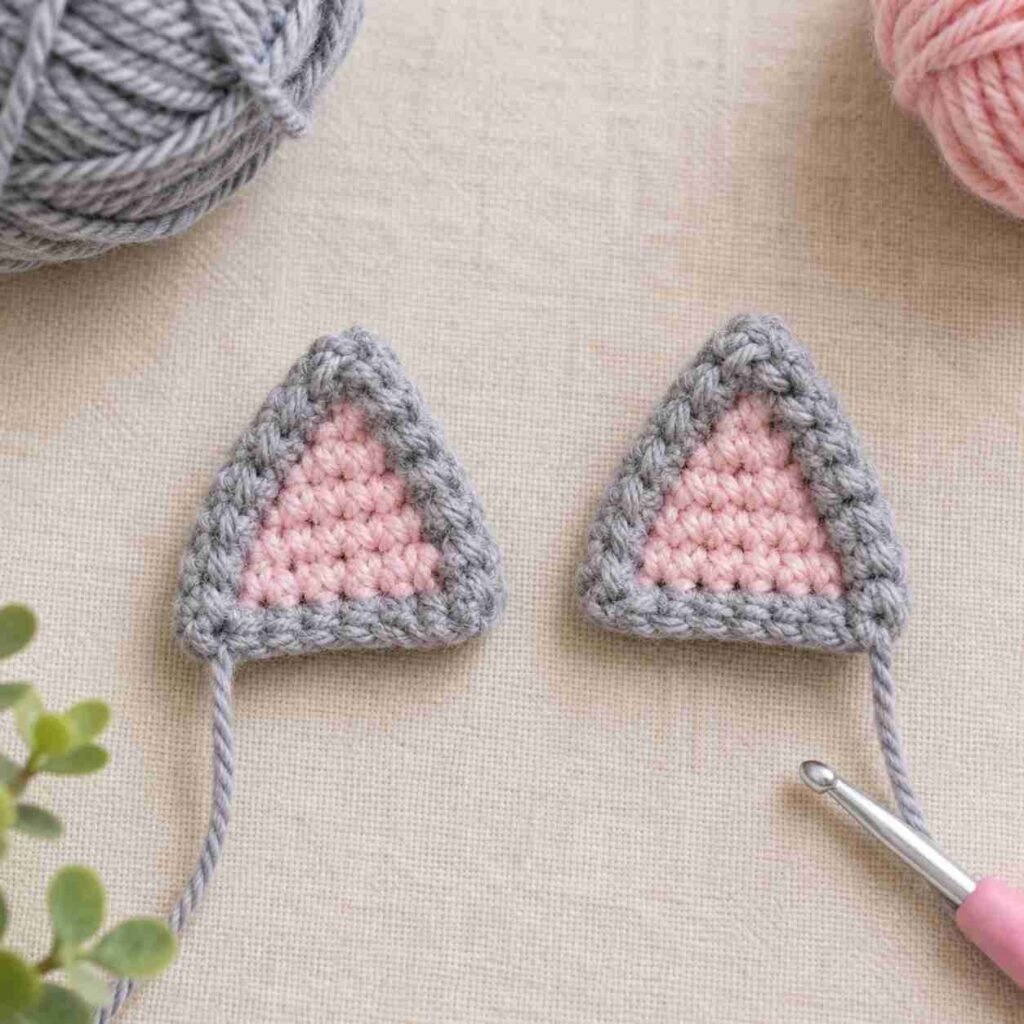
Fasten off, leaving a tail for sewing. Working ears flat rather than in the round is what creates the sharp, triangular point that makes an ear read as a cat’s ear rather than a rounded bear ear. Add a small triangle of pink yarn to the inner ear for contrast, if desired.
Body
Using main color:
- Rnd 1: MR, 6 sc into ring (6)
- Rnd 2: inc in each st around (12)
- Rnd 3: [sc, inc] x 6 (18)
- Rnd 4: [sc 2, inc] x 6 (24)
- Rnds 5-9: sc around (24) — 5 rounds
- Rnd 10: [sc 2, dec] x 6 (18)
Begin stuffing.
- Rnd 11: [sc, dec] x 6 (12)
Finish stuffing firmly.
- Rnd 12: dec x 6 (6)
Fasten off, leaving a long tail for attaching the head.
Front Legs / Paws (Make 2)
Using main color (switch to white for the last row if adding paw markings):
- Rnd 1: MR, 5 sc into ring (5)
- Rnds 2-6: sc around (5) — 5 rounds
Fasten off, leaving a tail for sewing. Do not stuff, or stuff only very lightly at the top.
Back Legs (Make 2)
Using main color:
- Rnd 1: MR, 6 sc into ring (6)
- Rnd 2: inc in each st around (12)
- Rnds 3-4: sc around (12) — 2 rounds
- Rnd 5: [sc, dec] x 4 (8)
- Rnds 6-8: sc around (8) — 3 rounds
Fasten off, leaving a tail for sewing. Stuff lightly, leaving the top flat for a stable sitting position.
Tail
Using main color:
- Rnd 1: MR, 5 sc into ring (5)
- Rnds 2-14: sc around (5) — 13 rounds
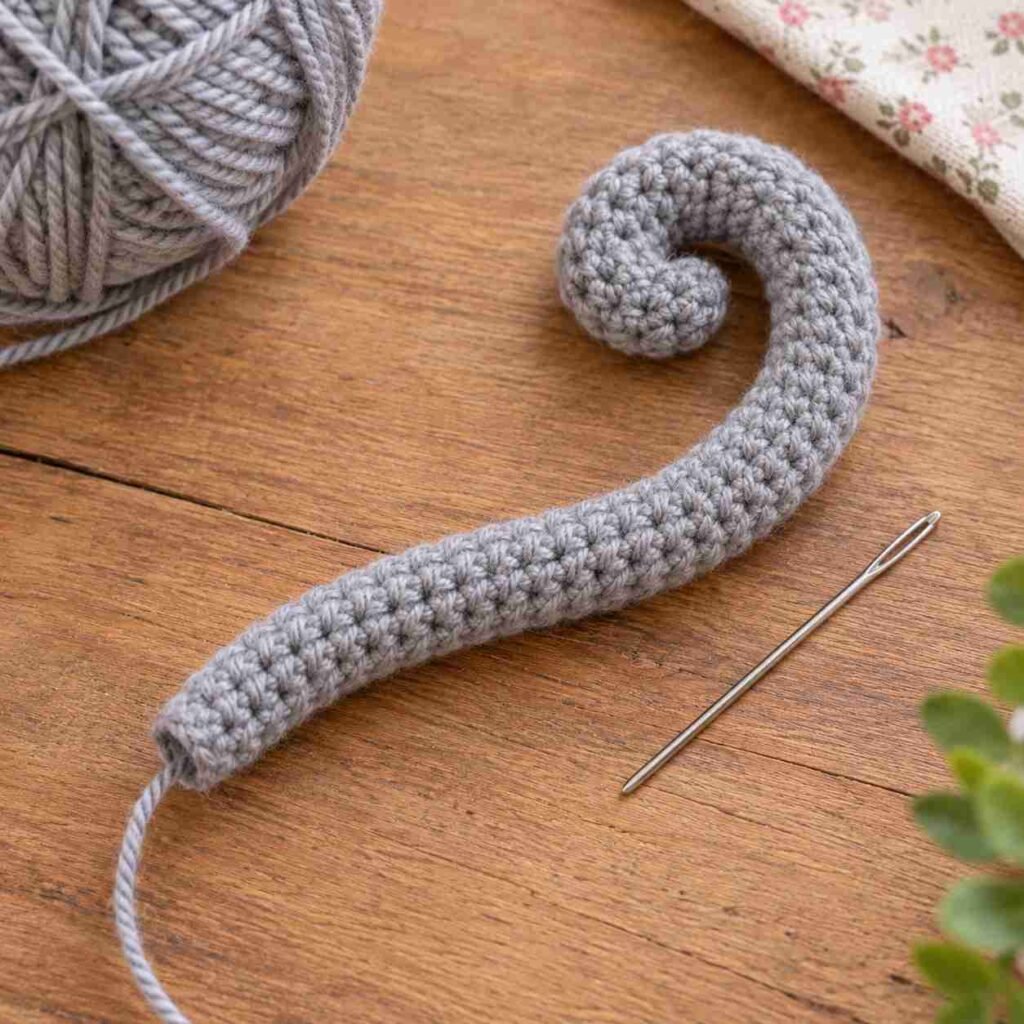
Fasten off, leaving a long tail for sewing. Do not stuff ,a cat’s tail should stay soft and flexible so it can be curved and posed after sewing, unlike the firmly stuffed round tail on the bunny pattern.
Assembly
Step 1: Sew the head to the top of the body, keeping it centered and slightly tilted forward for a more lifelike, alert pose.
Step 2: Sew the ears to the top of the head, angled slightly outward, spaced close together near the center.
Step 3: Attach the front legs/paws to the upper front of the body, and the back legs to the bottom, positioned slightly wider apart than the front legs so the cat can sit upright.
Step 4: Sew the tail to the lower back of the body, then curl it gently around one side and tack the tip in place with a single discreet stitch to hold the curl.
Step 5: Weave in all remaining ends and fluff the stuffing gently through the seams if needed.
Color Variations to Try
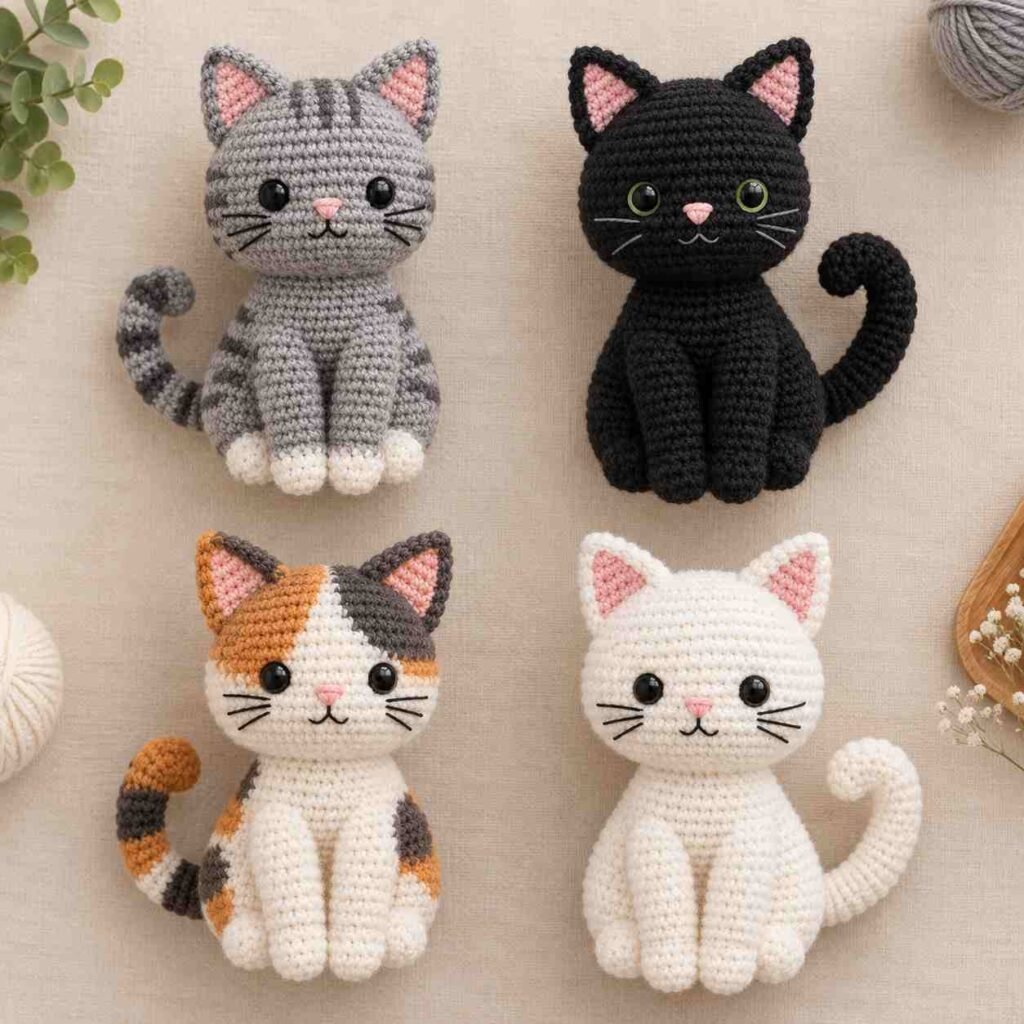
One of the easiest ways to make this pattern your own — or to design a cat that resembles a specific real-life pet , is to change the color layout. A few popular options:
- Classic Tabby: base color in warm gray or brown, with darker brown stripes embroidered or worked in surface crochet across the head, back, and tail
- Black Cat: solid black main color with green safety eyes for a striking, high-contrast look ,a popular seasonal variation around Halloween
- White & Ginger (Calico-inspired): white main body with patches of orange and black added as separate small pieces sewn on, or worked directly into the rounds as color changes
- All-White: solid white or cream, with pink inner ears and nose for a soft, minimalist look
Whichever combination you choose, plan your color changes before you start a section ,amigurumi color changes are much easier to manage at the start of a round than partway through.
Caring for Your Finished Amigurumi
A handmade amigurumi cat can last for years with a little basic care. If it becomes dusty or lightly soiled, spot-clean with a damp cloth and mild soap rather than fully submerging it, since prolonged soaking can cause safety eyes to loosen or stuffing to clump unevenly. If a full wash is needed, hand wash in cool water, gently squeeze out excess water (never wring), and reshape while damp before air-drying flat, away from direct heat or sunlight, which can fade yarn color over time.
Frequently Asked Questions
Can I make this pattern to look like my own cat? Yes — this is one of the most common uses for this pattern. Match the main color and markings to your cat’s coat, and consider adjusting eye color and any distinctive patches (like white paws or a chest patch) for a more personalized result.
Why are my cat’s ears rounded instead of pointed? This usually happens when the ears are crocheted in continuous rounds instead of flat rows. Working the ear pattern flat, as written above, is what creates the sharp point.
What’s the best yarn weight for a cat amigurumi? Worsted weight (US #4) gives the best balance of detail and speed for a cat this size. Thinner yarn (like sport or DK weight) can be used for a smaller, more detailed miniature version.
How do I keep the tail curled? After sewing the tail in place, curl it into the desired position and add one small, discreet stitch at the tip to tack it to the body — this holds the curve without stiffening the whole tail.
Can I use this pattern to make a kitten instead of an adult cat? Yes — simply reduce the body and head rounds by one repeat each (removing one increase round from both) for a smaller, more rounded kitten proportion.
Final Thoughts
Mochi introduces two new amigurumi skills ,flat-worked pointed ears and an unstuffed, poseable tail ,that you’ll be able to reuse on almost any future feline or fox-shaped pattern. Whether you keep to the classic tabby look or customize the colors to match a cat you know, we’d love to see the result. Share your finished amigurumi cat in the comments below, or tag us on social media !