Free Bunny Crochet Pattern (Amigurumi Rabbit)
Free Bunny Crochet Pattern (Amigurumi Rabbit)
This post contains affiliate links. If you purchase through these links, I may earn a small commission at no extra cost to you.
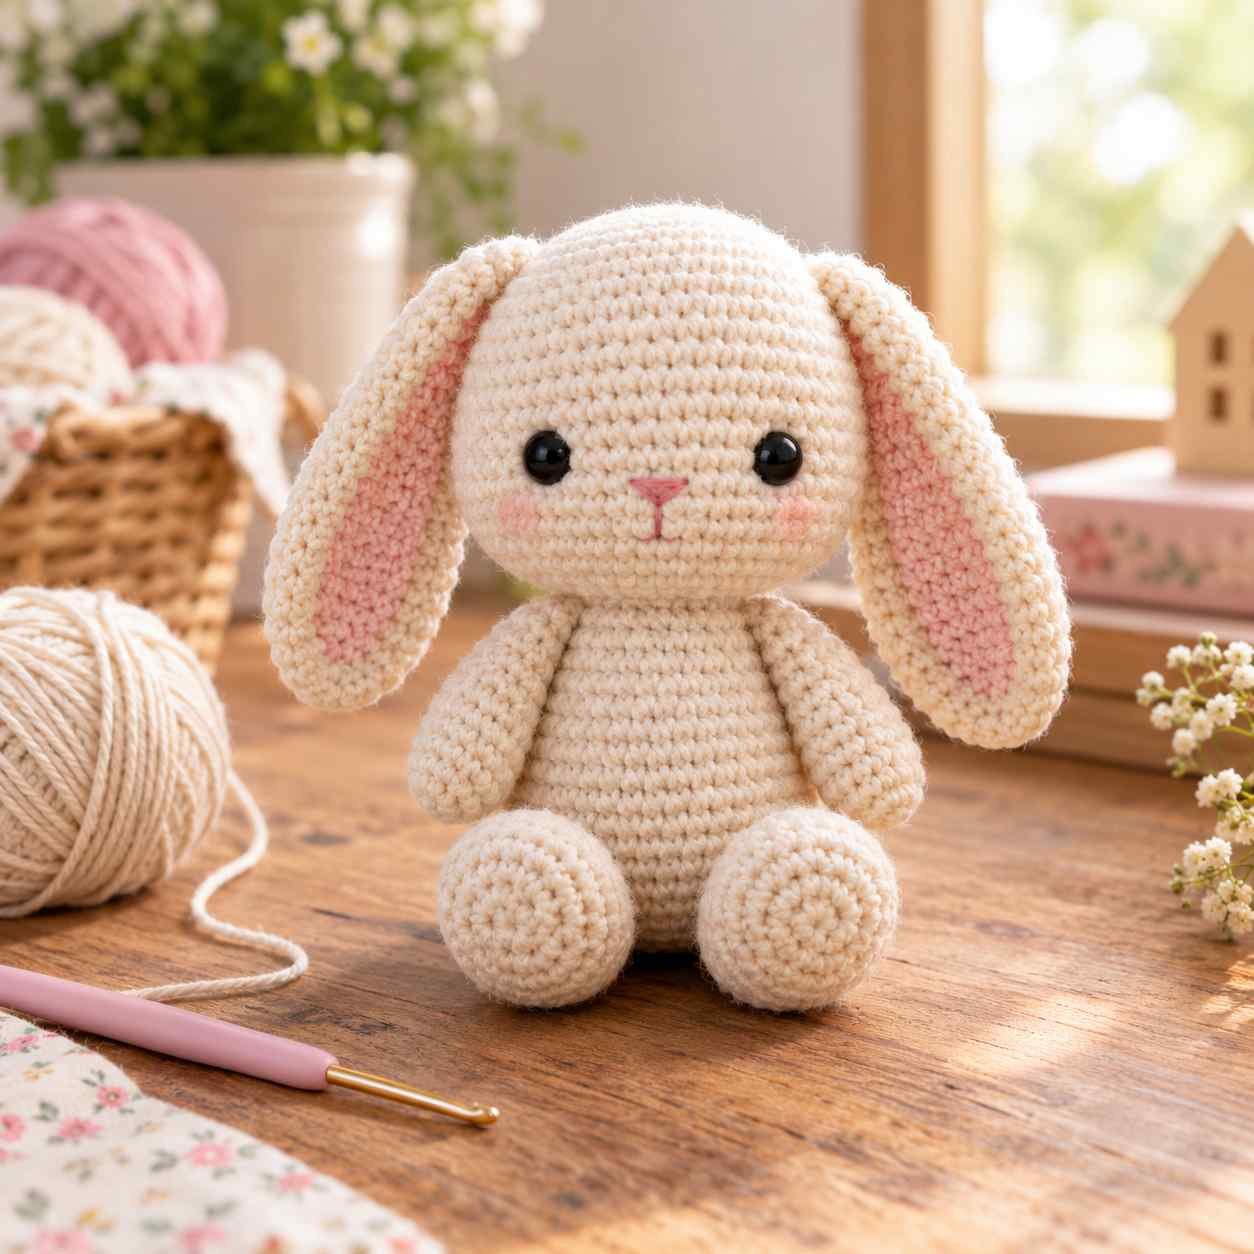
Meet Clover, a soft and cuddly amigurumi bunny that’s perfect whether you’re crocheting your very first stuffed animal or adding a new woodland friend to your collection. This pattern is designed to be beginner-friendly, using only basic stitches, while still producing a polished, professional-looking finished piece. Clover stands at approximately 8 inches tall, making her a great size for a shelf display, a nursery decoration, or a handmade gift.
This bunny is worked entirely in continuous rounds (no joining or turning), which keeps the process simple and beginner-friendly. Expect this project to take around 3-4 hours from start to finish, not counting drying time if you block any of the pieces. The materials below are budget-friendly and easy to find at most craft stores or online.
Materials Needed
To make this amigurumi bunny, you’ll need:
- Worsted weight yarn in your chosen main color (I recommend a soft cream or pale pink for a classic bunny look) ,approximately 100g
- Small amount of contrast yarn for the inner ears and nose detailing
- 3.5mm crochet hook (using a hook slightly smaller than recommended on the yarn label keeps stitches tight, which prevents stuffing from showing through)
- Polyester fiberfill stuffing
- 9mm safety eyes (or embroidery thread if making this for a child under 3, as safety eyes are a choking hazard for young children)
- Tapestry needle for sewing pieces together
- Stitch marker to track the beginning of each round
- Scissors
A quick note on yarn choice: while any worsted weight yarn will technically work, a yarn with a slight sheen or a cotton-acrylic blend tends to hold its shape better in amigurumi than a very soft, fluffy yarn, which can make it harder to see your stitches clearly as a beginner.
Finished Size
Using the materials listed above, Clover measures approximately 8 inches (20cm) tall when seated. Keep in mind that amigurumi size can vary quite a bit depending on your yarn weight, hook size, and how tightly you crochet ,using a smaller hook and thinner yarn will produce a smaller, denser bunny, while a larger hook and bulkier yarn will produce a bigger, softer one.
Gauge
Gauge isn’t critical for this pattern since it’s worked in the round and stuffed, but for reference:
- 4 single crochet stitches = 1 inch
- 4 rows = 1 inch
The most important thing isn’t matching this exactly , it’s keeping your tension consistent throughout the project so all your pieces are proportional to each other.
Tips Before You Start
A few notes that will make this project easier, especially if this is one of your first amigurumi projects:
- Use a stitch marker. Because this pattern is worked in continuous rounds rather than joined rounds, it’s easy to lose track of where a round begins.
- Count your stitches after every round. Amigurumi relies on precise stitch counts to create the right shape.
- Stuff firmly, but in small amounts at a time, for a smoother, more even shape.
- Use a smaller hook than the yarn label suggests, to keep stuffing from peeking through.
- Weave in ends securely ,amigurumi gets handled a lot, especially if it’s a gift for a child.
Bunny Crochet Pattern
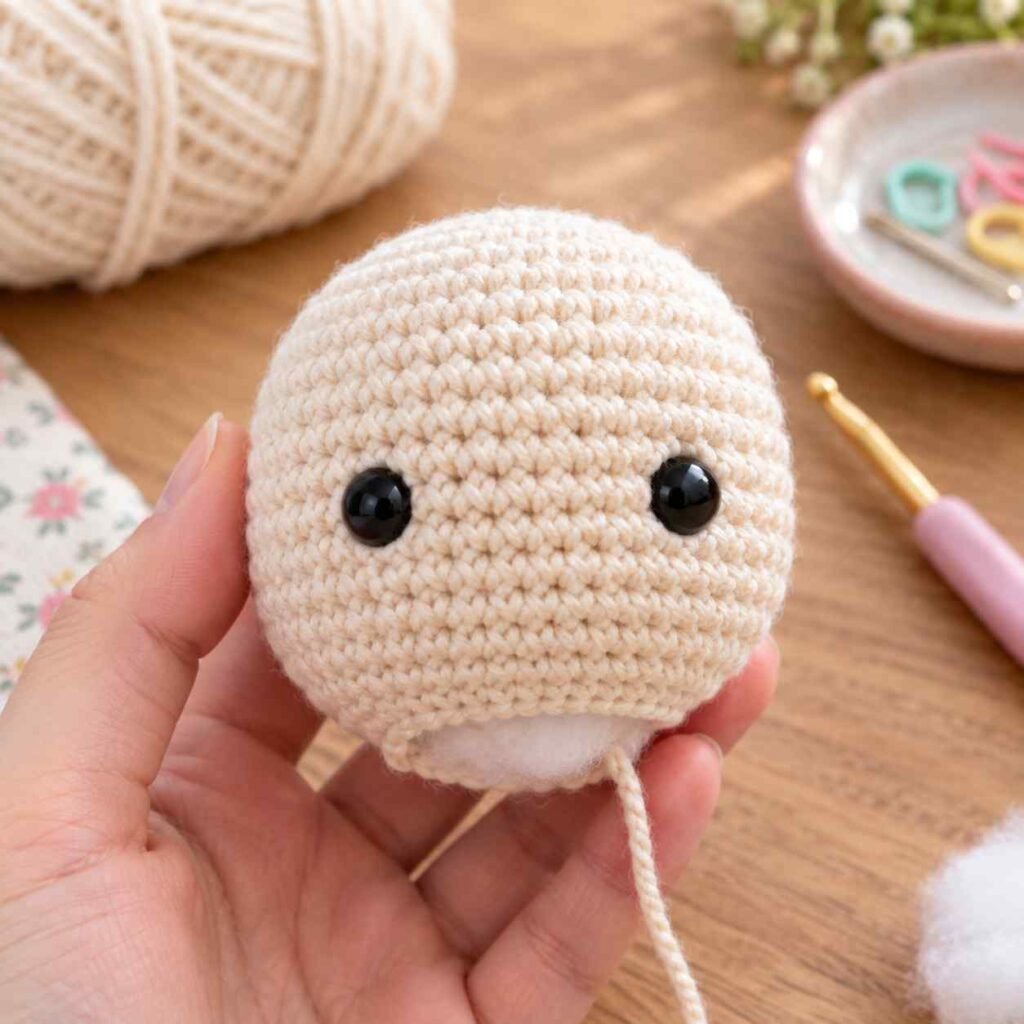
Head
Using main color:
- Rnd 1: MR, 6 sc into ring (6)
- Rnd 2: inc in each st around (12)
- Rnd 3: [sc, inc] x 6 (18)
- Rnd 4: [sc 2, inc] x 6 (24)
- Rnd 5: [sc 3, inc] x 6 (30)
- Rnd 6: [sc 4, inc] x 6 (36)
- Rnds 7-12: sc around (36) — 6 rounds
Insert safety eyes between rounds 8 and 9, with about 8 stitches between them. Insert eyes now, before continuing, since it’s much harder to add them once the head is stuffed. New to inserting safety eyes? See our Safety Eye Tutorial for a closer look.
- Rnd 13: [sc 4, dec] x 6 (30)
- Rnd 14: [sc 3, dec] x 6 (24)
Begin stuffing the head firmly.
- Rnd 15: [sc 2, dec] x 6 (18)
- Rnd 16: [sc 1, dec] x 6 (12)
Finish stuffing.
- Rnd 17: dec x 6 (6)
Fasten off, leaving a long tail for sewing the head to the body later. Weave the tail through the front loops of the remaining 6 stitches, pull tight to close the opening.
Embroider a small vertical “Y” or “T” shape in contrast thread over rounds 3-4, centered between the eyes, for the nose and mouth.
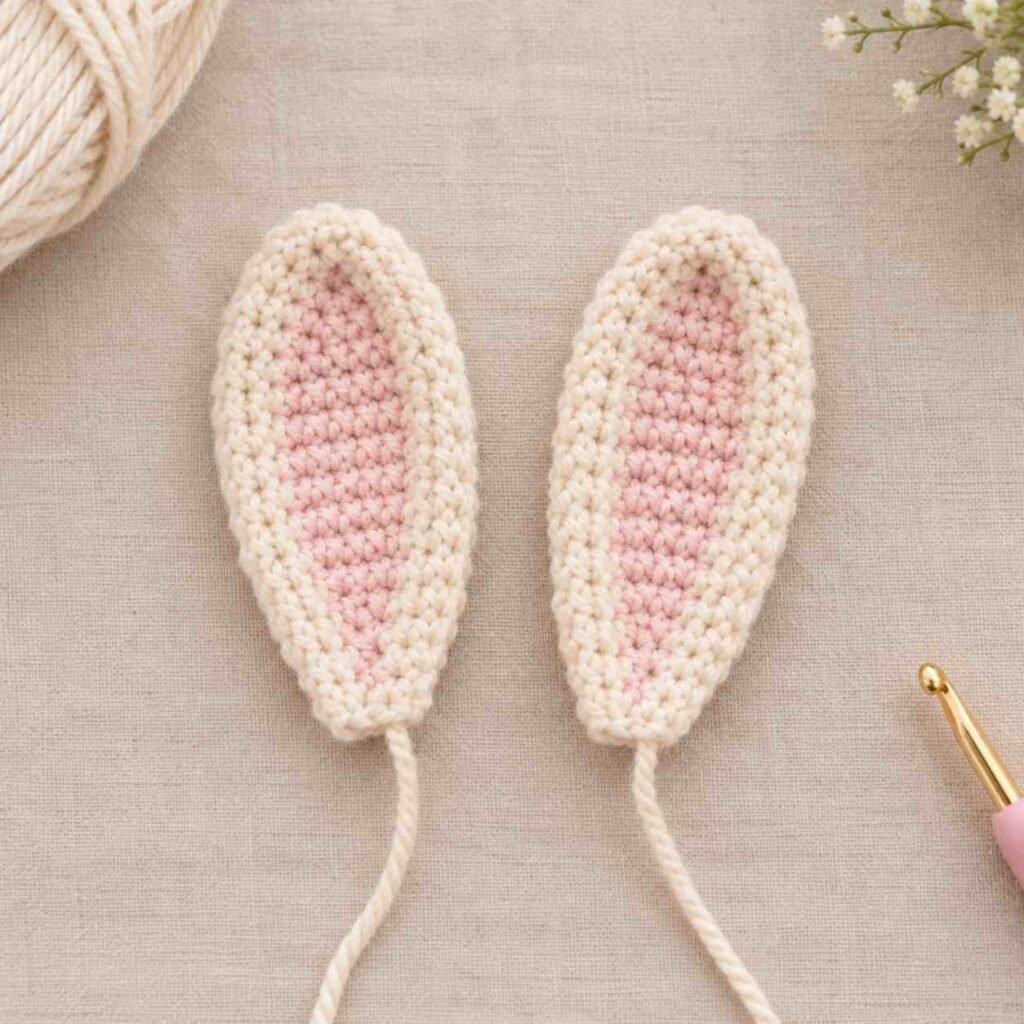
Ears (Make 2)
Using main color:
- Rnd 1: MR, 6 sc into ring (6)
- Rnd 2: [sc, inc] x 3 (9)
- Rnd 3: [sc 2, inc] x 3 (12)
- Rnds 4-8: sc around (12) — 5 rounds
- Rnd 9: [sc 2, dec] x 3 (9)
Fasten off, leaving a long tail for sewing. Flatten the ear and, using contrast yarn, add a few rows of surface slip stitches down the center for the inner-ear detail if desired. Repeat for the second ear.
Ears are not stuffed ,this keeps them soft and gives them a slight floppy quality when sewn on.
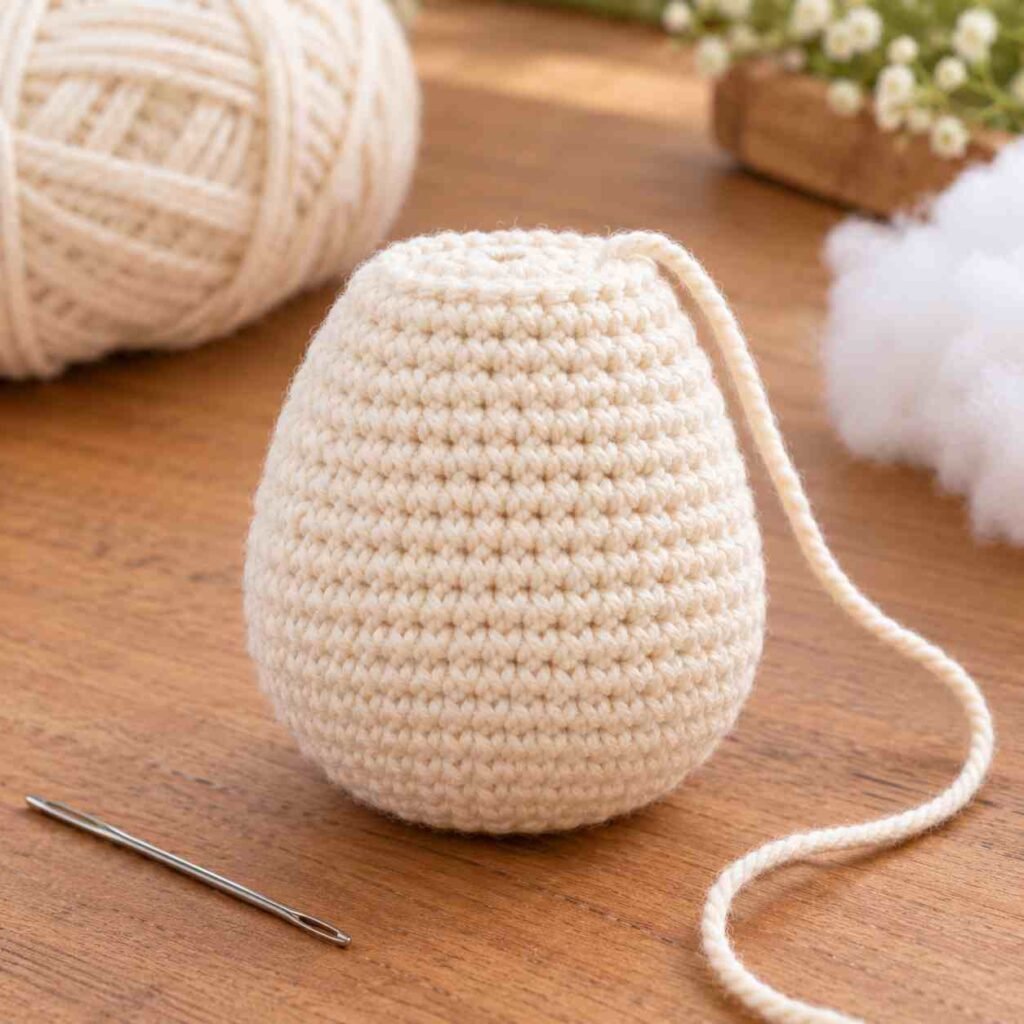
Body
Using main color:
- Rnd 1: MR, 6 sc into ring (6)
- Rnd 2: inc in each st around (12)
- Rnd 3: [sc, inc] x 6 (18)
- Rnd 4: [sc 2, inc] x 6 (24)
- Rnds 5-10: sc around (24) — 6 rounds
- Rnd 11: [sc 2, dec] x 6 (18)
Begin stuffing.
- Rnd 12: [sc, dec] x 6 (12)
Finish stuffing firmly.
- Rnd 13: dec x 6 (6)
Fasten off, leaving a long tail for attaching the head.
Arms (Make 2)
Using main color:
- Rnd 1: MR, 5 sc into ring (5)
- Rnds 2-8: sc around (5) — 7 rounds
Fasten off, leaving a long tail for sewing. Do not stuff, or stuff only very lightly at the very top — this allows the arms to lie flat against the body.
Legs (Make 2)
Using main color:
- Rnd 1: MR, 6 sc into ring (6)
- Rnd 2: inc in each st around (12)
- Rnds 3-4: sc around (12) — 2 rounds
- Rnd 5: [sc 2, dec] x 3 (9)
- Rnds 6-9: sc around (9) — 4 rounds
Fasten off, leaving a long tail for sewing. Stuff lightly.
Tail
Using main color:
- Rnd 1: MR, 5 sc into ring (5)
- Rnd 2: inc in each st around (10)
- Rnd 3: sc around (10)
- Rnd 4: dec x 5 (5)
Fasten off, leaving a short tail for sewing. Stuff lightly, and sew on with a “puffed” appearance ,bunny tails are round and compact rather than elongated.
Assembly
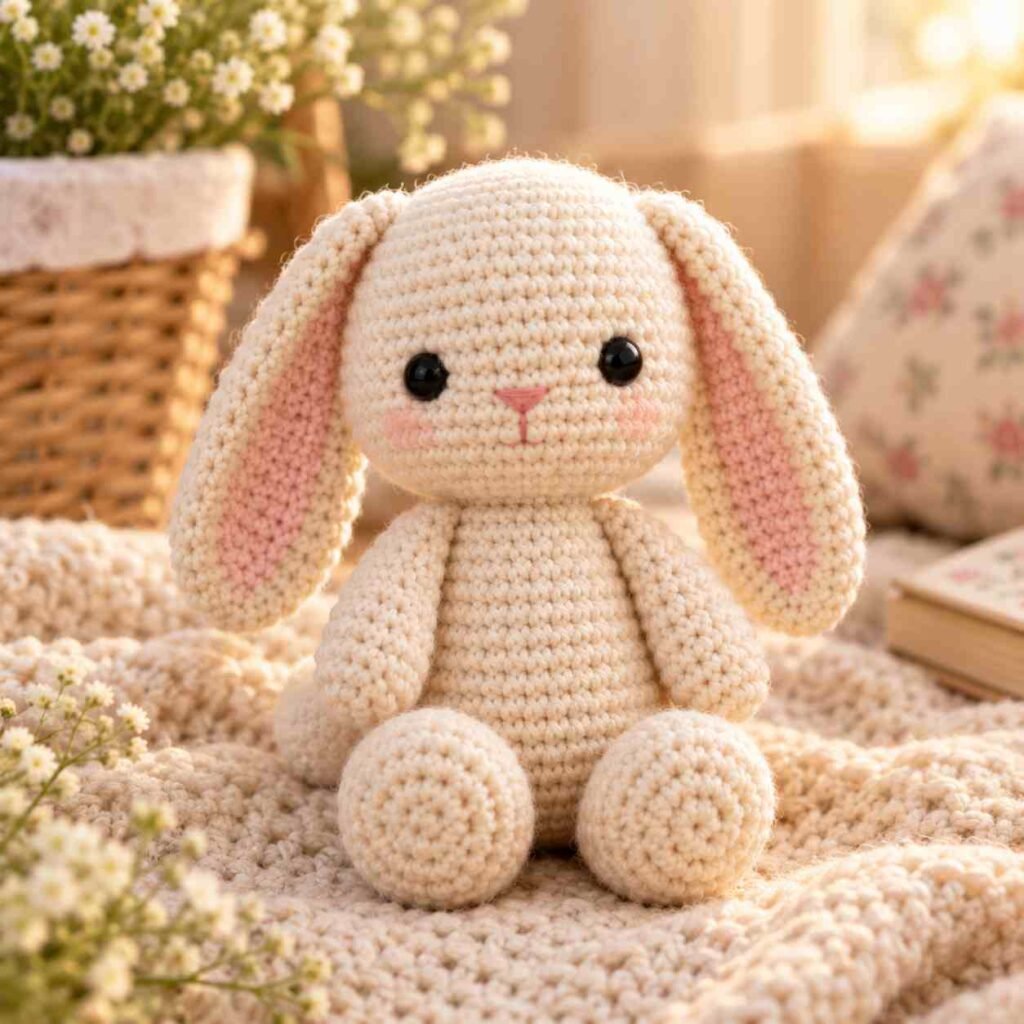
Step 1: Attach the head to the body. Using the yarn tail left on the body, pin the head centered on top of the body opening, then sew around the circumference, keeping tension even so the head sits straight.
Step 2: Sew on the ears. Position the ears on either side of the top of the head, angled slightly outward, with about 3-4 stitches between them at the base.
Step 3: Attach the arms. Sew the arms to either side of the body, roughly level with the top third of the body, so they angle slightly forward.
Step 4: Attach the legs. Sew the legs to the bottom front of the body so the bunny can sit upright.
Step 5: Attach the tail. Sew the tail to the center back of the body, roughly level with the legs.
Step 6: Final touches. Once everything is sewn on, gently fluff the stuffing through the seams if needed, and trim any remaining yarn tails close to the body.
Frequently Asked Questions
How long does it take to crochet this bunny amigurumi? Most beginners complete this bunny crochet pattern in about 3-4 hours, spread across a few sittings. More experienced crocheters may finish in under 2 hours.
What size hook should I use for amigurumi? For this bunny pattern, a 3.5mm hook works best with worsted weight yarn. Using a hook slightly smaller than the label recommends helps keep stitches tight so stuffing doesn’t show through.
Can I make this pattern bigger or smaller? Yes — switching to a bulkier yarn and larger hook will produce a bigger bunny, while thinner yarn and a smaller hook will make a mini version. Just keep your tension consistent throughout.
Is this bunny amigurumi pattern beginner-friendly? Yes, this pattern only uses basic stitches (single crochet, increase, decrease) worked in continuous rounds, making it a great first amigurumi project.
Final Thoughts
And that’s it ,your very own amigurumi bunny is complete! This pattern is a great one to practice basic amigurumi shaping (rounds of increases and decreases) before moving on to more complex animal shapes with multiple color changes. If you enjoyed this pattern, I’d love to see your finished bunny ,feel free to share a photo in the comments below or tag us on social media.
We hope you enjoyed this bunny crochet pattern ,it’s the perfect beginner project to build your amigurumi skills before tackling more advanced animal patterns.